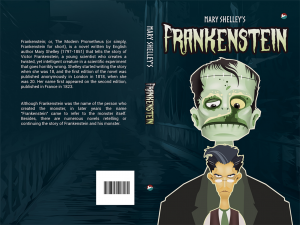
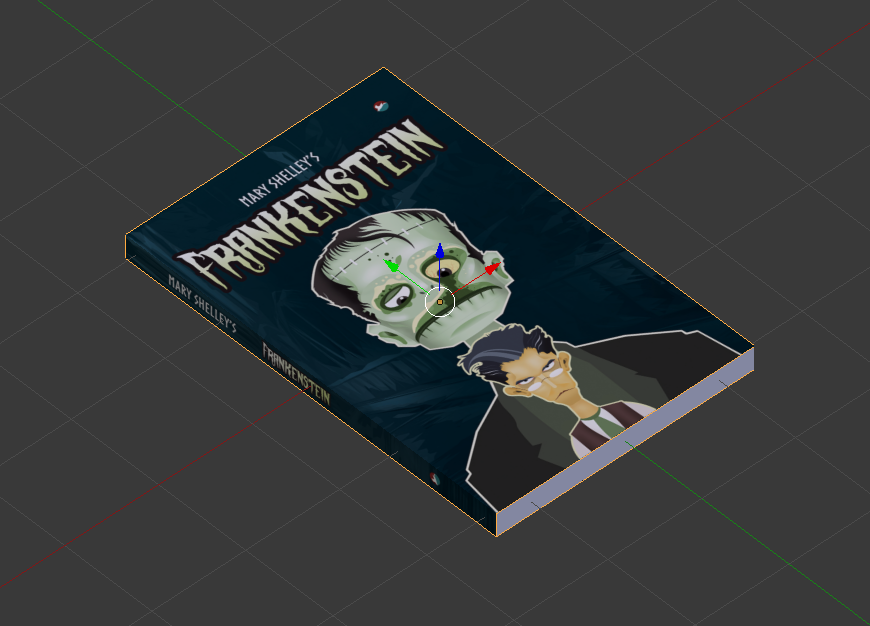
For all the Blender beginners out there, here is a complete step-by-step guide to create a 3D book.
Requirements: Cover image of any book(Front, back and spine as one complete image).
Software: Blender.
Skill level: Easy (basic knowledge of Blender’s interface and navigation controls required)
Note : Before beginning with the tutorial, make a note of the cover dimensions (Front cover and spine).
Part 1: Modelling the book.
- Open Blender and select the cube (it will be our model for the book) and press ‘N’ to open the Cube’s properties panel.
- Change the value of X as the width of the front cover, and Y to the height. The value of Z will be the spine.
Note : The cover size I have chosen is 5.5 X 8.5 with 0.5 as the spine.
- After entering values, select the cube and press ‘S’ and type 0.5. This is to reduce the book size by half so it fits better in our scene.
Part 2: Wrapping the cover image on the created model
We now have to separate the front, spine and back from cube so we can place our cover image.
-
- Press ‘TAB’ to enter into Edit mode.
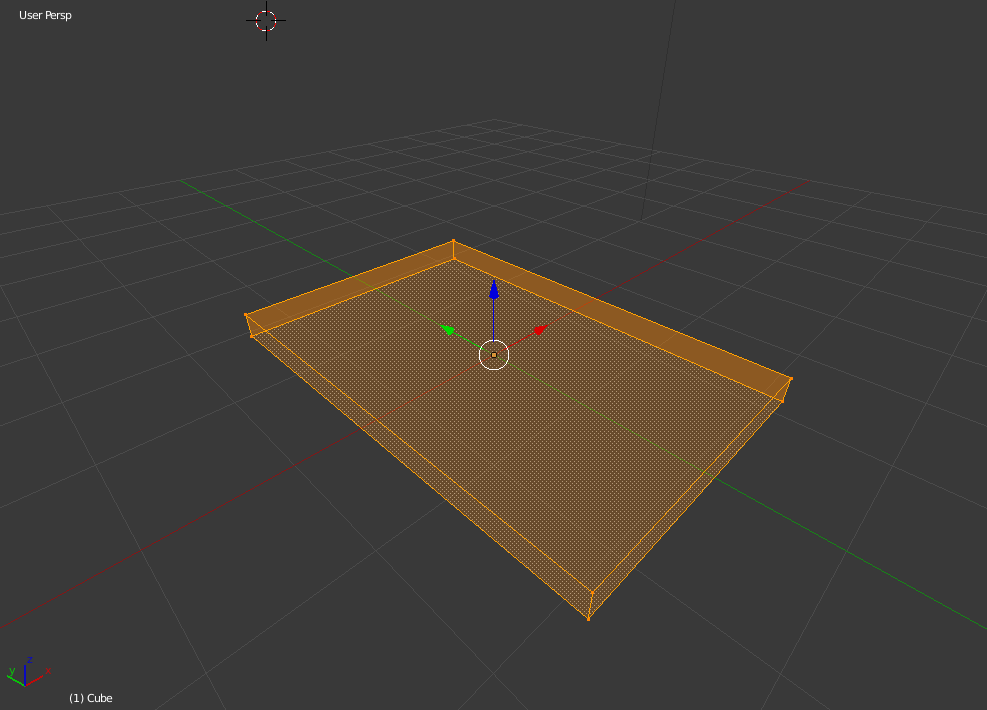
- Then hit ‘Z’ to view the model in Wireframe Mode.
This is what you should be able to see.
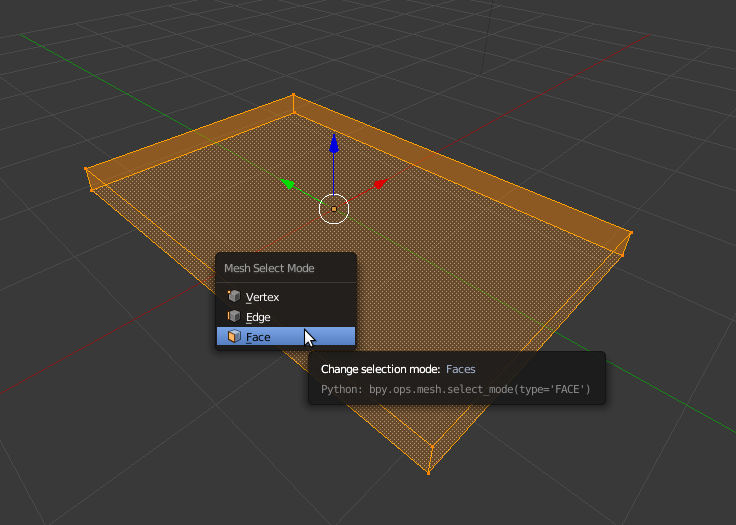
- Now hit ‘CTRL + TAB’ to open mesh selection type.
- Select ‘Face’ option.
-
- Hit ‘5’ to change to orthographic view. Then hit ‘7’ for top view. Select the Top facing side (this will be the front cover).
- Hit ‘CTRL + 3’ to view the left side, hold shift+right click to select the side which is to be the spine.
- Then hit ‘CTRL + 7’ for bottom view and Select the face holding shift again.
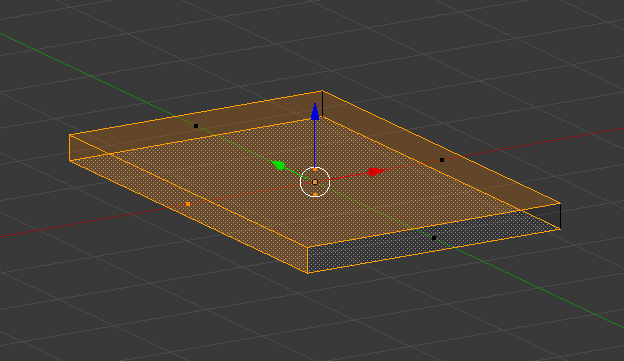
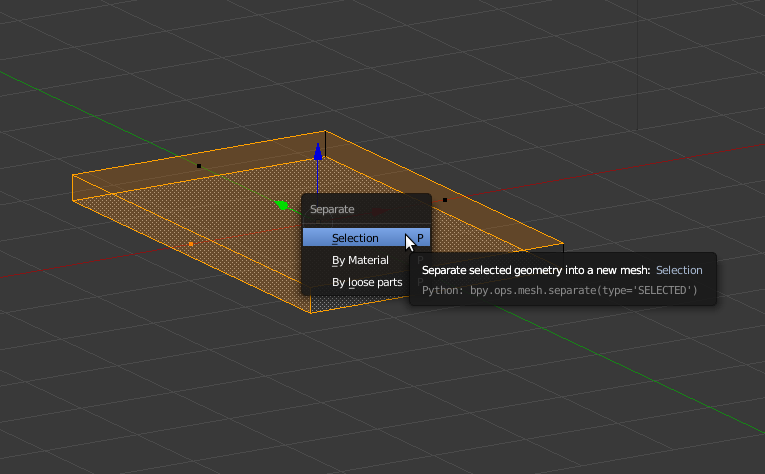
You should have the following selection of the mesh.
- Now hit ‘P’ and select ‘Selection’.
- We have now separated our original mesh into two(cube and cube 001).
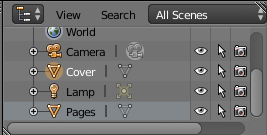
- Go to the Outliner panel on the top right corner of the window, and rename the cube as Pages and cube 001 as Cover.
- Leave the book cover mesh selected.
UV Unwrap mesh to image
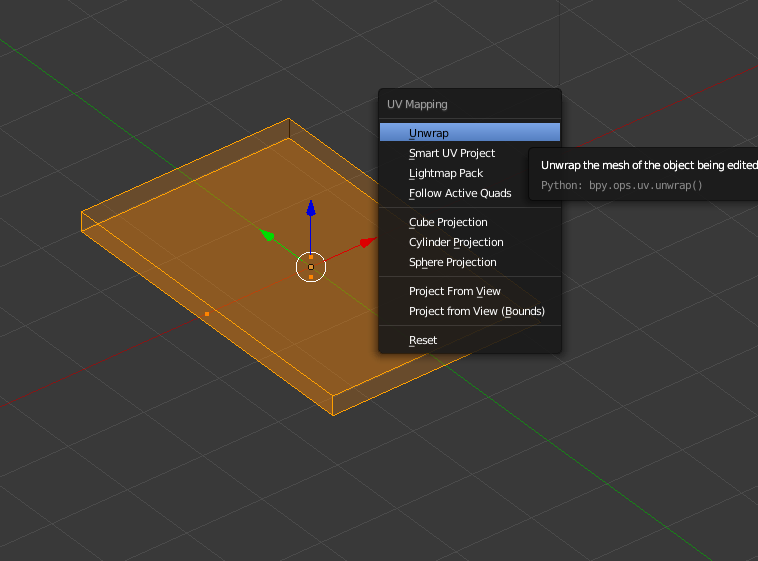
Now we will Unwrap the mesh called Cover so we can place our cover image.
- Hit ‘TAB’ to go Edit mode again.
- Hit ‘A’ to select the whole mesh.
- Then hit ‘U’ and select ‘Unwrap’.
Applying Material to the cover
- To do that, select ‘Cover’ mesh.
- Then change the render engine from ‘Blender Render‘ to ‘Cycles Render‘.
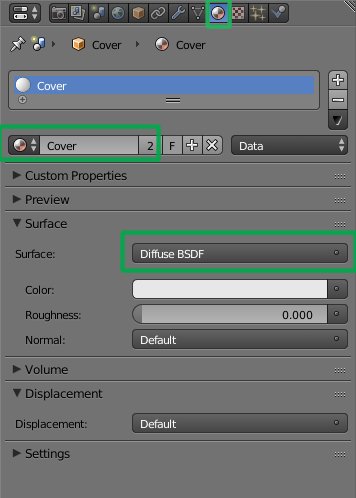
- Select the mesh ‘Cover’ and click on the Materials symbol in the properties panel on the right.
- Rename the material as ‘Cover’ and select ‘Diffuse BSDF’ texture.
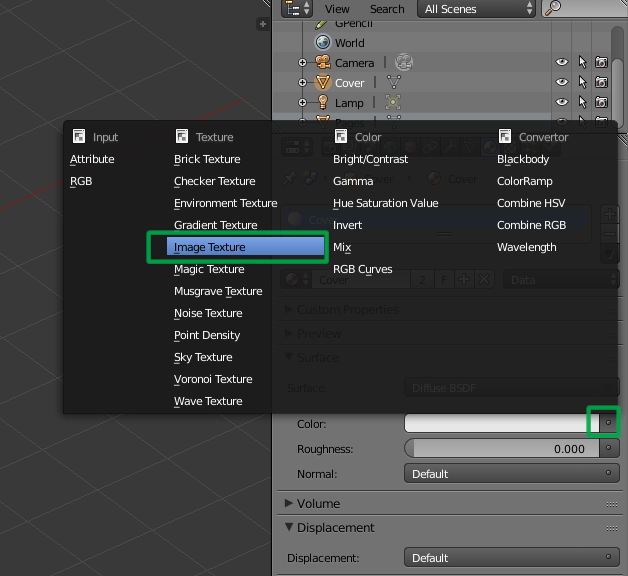
- Click the Grey dot next to the Color box and choose ‘Image Texture‘ from the menu.
- Click on Folder icon and import your cover image file.
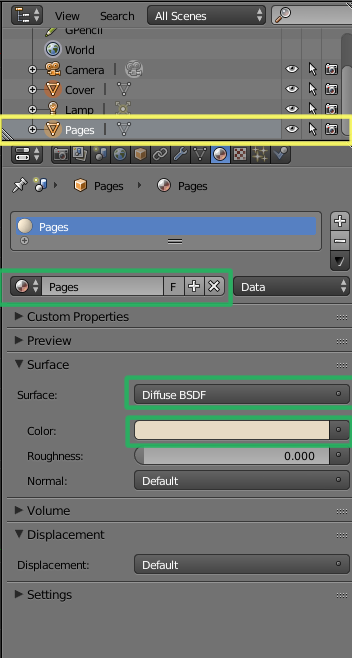
- Once the material is set for the cover, next select the mesh ‘Pages’ from the outliner window.
- Rename the material to ‘Pages‘.
- For Surface choose ‘Diffuse BSDF‘ shader option
- For Color, select an off-white color for the pages.
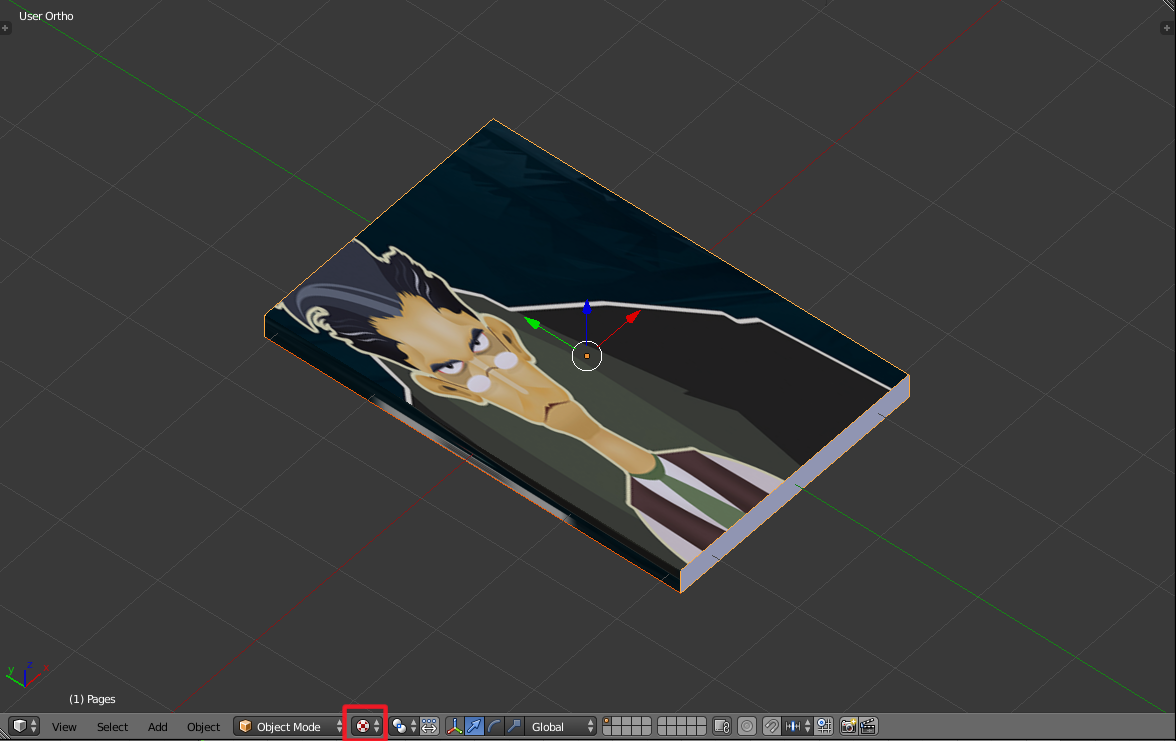
Lets look at what we have now:
- Click on the mesh preview type and select ‘Texture’.
Now we can see that the cover is wrapped around our mesh, but the position is a bit off. Lets rectify this.
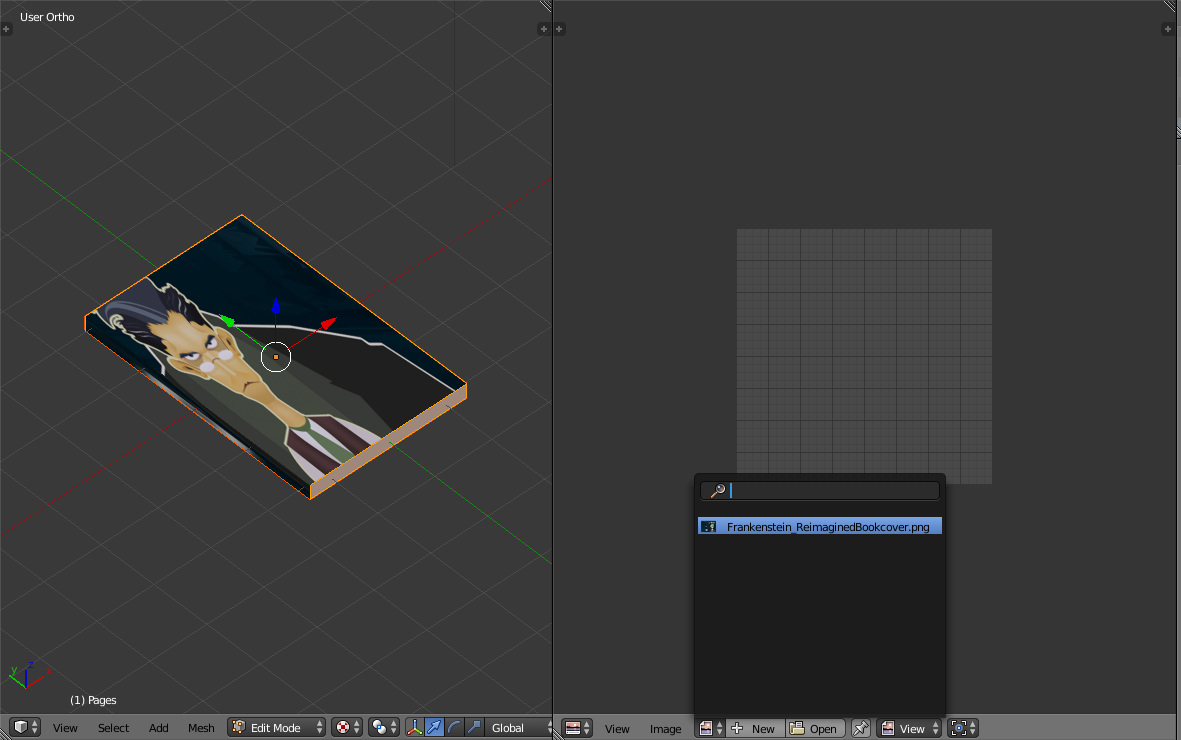
- Divide the window and open the UV image editor in the second window.
- Hit ‘TAB’ to go into Edit mode.
- In the UV editor click on open and select our book cover image as selected below.
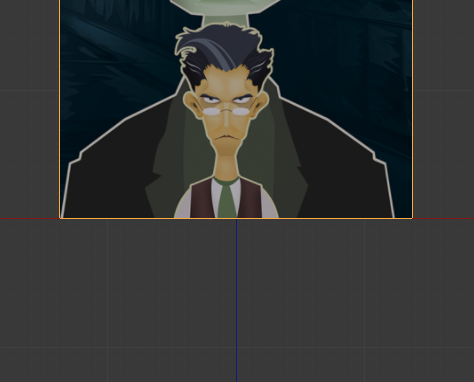
The Editor shows us the the current position of the wrapping.
- To wrap it properly, we can select individual vertices or edges and move them by hitting ‘G’.
The image below shows us the correct position of our unwrapping.
We now have our book ready and wrapped.
Part 3: Lighting
Before adding the light source, let us position the book at the center.
- Hit ‘G’ and align the book with the grid floor.
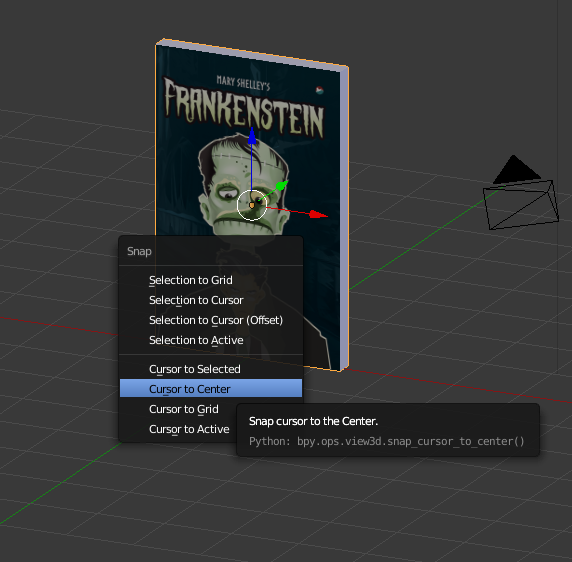
- Hit ‘CTRL + S’ and reposition the 3D cursor to the centre.
- First we will add a floor, hold ‘Shift+A’ and from the mesh menu select ‘Plane‘.
- Hit ‘S’ and type in ‘10‘.
- Name the plane as ‘floor’.
- Add another plane the same way, but increase its size by 3. This will be our single light source.
The scene we are attempting is fairly basic so we will use just a single light setup.
- Hit ‘1‘ to go to front view.
- To position the camera hold ‘Ctrl + Alt + 0’.
- Select the light source and position it above the floor and book mesh.
- Select the materials from the properties menu.
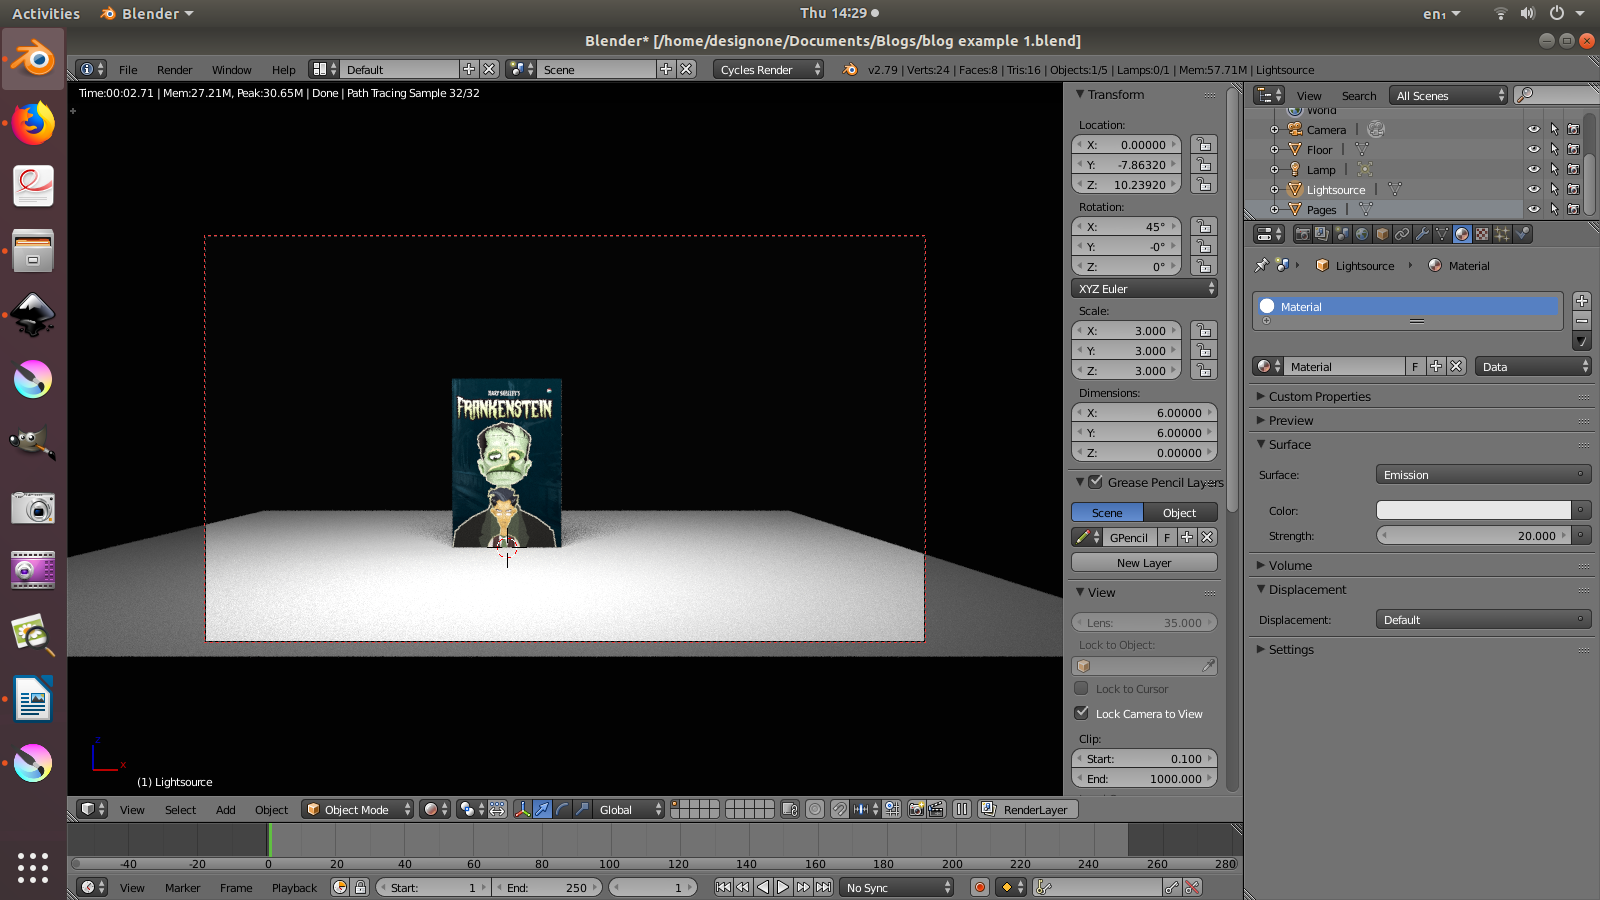
- Hit ‘Use Nodes’ and select ‘Emission’ as the shader and set the strength to ’20’.
You can experiment with these values.
Note: Delete the default lamp in the scene by selecting it and then pressing ‘X’.
The image below shows us the result.
Part 4: Rendering
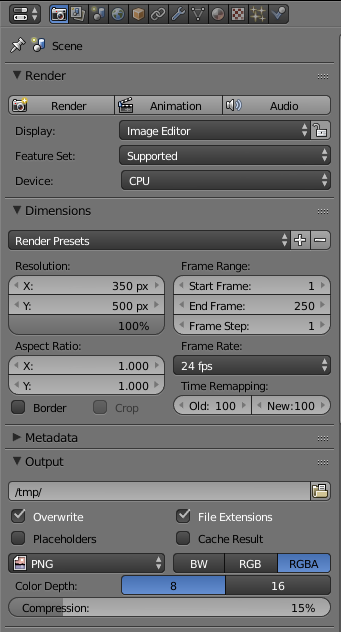
Next we will have to set the render settings.
- Click on the camera icon and and enter the settings as shown in the images below.
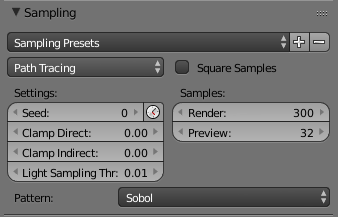
- Also enter the values for the sampling.
- I have set the floor material to ‘Glossy’ with a roughness of 0.1. and the world color to an off-white shade.
- Now hit the ‘Render’ button.
- You will have the result as shown below.
- Press ‘F3’ to save the image.
Thats it !! Now you can play around with different camera angles to get your perfect shot.
Are you a newbie to WordPress ? Get started by reading this WordPress Guide : 7 Best Practices.

